Loch Lomond: Difference between revisions
Jump to navigation
Jump to search
imported>Hairycow No edit summary |
imported>Hairycow No edit summary |
||
| Line 1: | Line 1: | ||
{{avalanche hazard}} | {{avalanche hazard}} | ||
{{Trip Box | |||
| Name=Loch Lomond | |||
| Rating=Beginner | |||
| Location Key=C | |||
| Technical Notes=Short Day, Flat | |||
| Map Refs=92G/11E | |||
| Ski distance=Road 4km Route 3.5km | |||
| Time=Road 2hrs Route 1hrs | |||
| Start Elevation=580m | |||
| High Point=1160m}} | |||
==Access== | |||
Take the Indian Arm spur off the Mamquam Road (right fork at 3.7km). This road is usually | |||
==Route== | |||
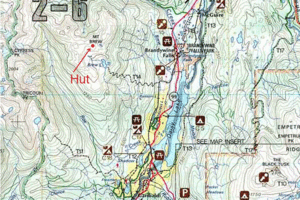
[[Image:BrewMap.gif|thumb|left|Topo of Mt. Brew Area, Map: 92G/14]] | |||
<br style="clear: left"/> | |||
==Hut and Trail Conditions== | |||
[[Category:Hiking Trips]] | [[Category:Hiking Trips]] | ||
[[Category:Skiing Trips]] | [[Category:Skiing Trips]] | ||
[[Category:Squamish-Whistler]] | [[Category:Squamish-Whistler]] | ||
Revision as of 20:41, 25 January 2008
| Avalanche Hazard | |
| The route and terrain described here is capable of producing avalanches. Safe travel requires the skills and equipment to assess and mitigate avalanche hazards. A professionally taught training course is highly recommended. |
Access
Take the Indian Arm spur off the Mamquam Road (right fork at 3.7km). This road is usually
Route
